

搜索到
144
篇与
的结果
-
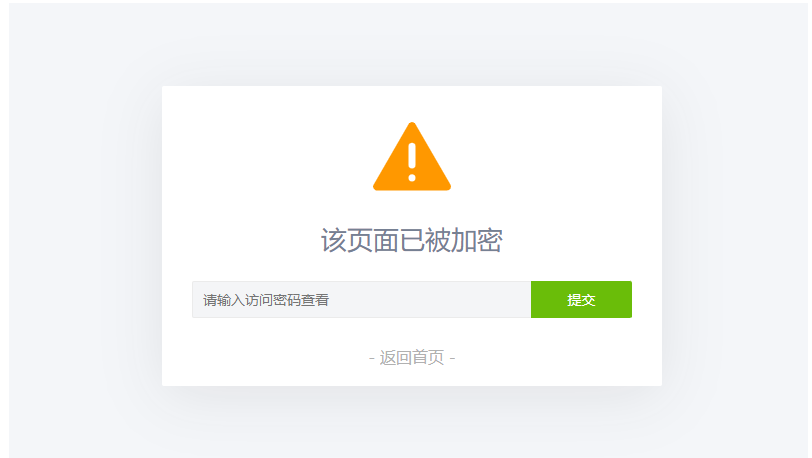
 给PHP页面设置访问密码,PHP页面怎么设置页面访问密码 为你的页面支持加密访问无论什么程序只要是PHP程序都是支持这代码的,来实现加密访问你的加密页面或文章等等的页面,不保证其他程序可以正常使用麻烦先测试! 密码正确才能进去页面,进入后会存下cookies值,下一次登录的时候则不需要再次输入了。如果不想给人看了,只需要更改密码,cookies就会立即失效,必须要重新登陆才能看。安装方法:1、新建PHP文件,命名为:mima.php,把下面代码放进这个新建为PHP文件里面<?php /** * 使用说明: * 1. 将本脚本保存为 PageEncrypt.php。 * 2. 在您想要加密的PHP页面开头包含这个文件: * require_once('PageEncrypt.php'); * 3. 设置页面访问密码: * PageEncrypt('页面密码'); */ // 定义密码Cookie加密盐,若未定义则设置默认值 if (!defined('MK_ENCRYPT_SALT')) { define('MK_ENCRYPT_SALT', 'Kgs$JC!V'); } /** * 设置页面访问密码 * @param string $password 访问密码 * @param string $pageid 页面唯一ID,用于区分同一网站的不同加密页面,默认为'default' */ function PageEncrypt($password, $pageid = 'default') { // 生成页面ID并进行MD5加密 $pageid = md5($pageid); // 对密码进行双重MD5加密,并附加盐值 $md5pw = md5(md5($password) . MK_ENCRYPT_SALT); // 获取POST提交的密码,若不存在则设为空字符串 $postpwd = filter_input(INPUT_POST, 'pagepwd', FILTER_SANITIZE_STRING); // 获取Cookie中保存的密码,若不存在则设为空字符串 $cookieName = 'mk_encrypt_' . $pageid; $cookiepwd = filter_input(INPUT_COOKIE, $cookieName, FILTER_SANITIZE_STRING); // 如果Cookie中的密码匹配,则直接返回 if (hash_equals($md5pw, $cookiepwd)) { return; } // 如果提交的密码正确,则设置Cookie并返回 if (hash_equals($md5pw, md5(md5($postpwd) . MK_ENCRYPT_SALT))) { setcookie($cookieName, $md5pw, time() + 3600000, '/'); return; } // 密码验证失败,显示密码输入页面 header('Content-Type: text/html; charset=UTF-8'); ?> <!DOCTYPE html> <html lang="zh-CN"> <head> <meta charset="UTF-8"> <meta http-equiv="X-UA-Compatible" content="IE=edge"> <meta name="viewport" content="width=device-width, initial-scale=1.0"> <title>该页面已被加密</title> <style type="text/css"> *{font-family:"Microsoft Yahei",微软雅黑,"Helvetica Neue",Helvetica,"Hiragino Sans GB","WenQuanYi Micro Hei",sans-serif;box-sizing:border-box;margin:0px;padding:0px;font-size:14px;-webkit-transition:.2s;-moz-transition:.2s;-ms-transition:.2s;-o-transition:.2s;transition:.2s} html,body{width:100%;height:100%} body{background-color:#F4F6F9;color:#768093} input,button{font-size:1em;border-radius:3px;-webkit-appearance:none} input{width:100%;padding:5px;box-sizing:border-box;border:1px solid #e5e9ef;background-color:#f4f5f7;resize:vertical} input:focus{background-color:#fff;outline:none} button{border:0;background:#6abd09;color:#fff;cursor:pointer;opacity:1;user-select:none} button:hover,button:focus{opacity:.9} button:active{opacity:1} .main{width:100%;max-width:500px;height:300px;padding:30px;background-color:#fff;border-radius:2px;box-shadow:0 10px 60px 0 rgba(29,29,31,0.09);transition:all .12s ease-out;position:absolute;left:0;top:0;bottom:0;right:0;margin:auto;text-align:center} .alert{width:80px} .mk-side-form{margin-bottom:28px} .mk-side-form input{float:left;padding:2px 10px;width:77%;height:37px;border:1px solid #ebebeb;border-right-color:transparent;border-radius:2px 0 0 2px;line-height:37px} .mk-side-form button{position:relative;overflow:visible;width:23%;height:37px;border-radius:0 2px 2px 0;text-transform:uppercase} .pw-tip{font-weight:normal;font-size:26px;text-align:center;margin:25px auto} #pw-error {color: red;margin-top: 15px;margin-bottom: -20px;} .return-home{text-decoration:none;color:#b1b1b1;font-size:16px} .return-home:hover{color:#1E9FFF;letter-spacing:5px} </style> </head> <body> <div class="main"> <svg class="alert" viewBox="0 0 1084 1024" xmlns="http://www.w3.org/2000/svg" width="80" height="80"> <defs><style/></defs> <path d="M1060.744 895.036L590.547 80.656a55.959 55.959 0 0 0-96.919 0L22.588 896.662a55.959 55.959 0 0 0 48.43 83.907h942.14a55.959 55.959 0 0 0 47.525-85.534zm-470.619-85.172a48.008 48.008 0 1 1-96.015 0v-1.567a48.008 48.008 0 1 1 96.015 0v1.567zm0-175.345a48.008 48.008 0 1 1-96.015 0V379.362a48.008 48.008 0 1 1 96.015 0v255.157z" fill="#FF9800"/> </svg> <form action="" method="post" class="mk-side-form"> <h2>该页面已被加密</h2> <input type="password" name="pagepwd" placeholder="请输入访问密码查看" required> <button type="submit">提交</button> <?php if ($postpwd): ?> <p id="pw-error">哎哟!密码不对哦~</p> <script>setTimeout(function() {document.getElementById('pw-error').style.display = 'none';}, 2000);</script> <?php endif; ?> </form> <a href="/" class="return-home">- 返回首页 -</a> </div> </body> </html> <?php exit(); } ?>2、把下面的代码放进你要加密的PHP页面里面,比如你要给首页:index.php 加密,就把下面代码放在index.php 的最前面<?php require_once('PageEncrypt.php'); PageEncrypt('1234');//这个就是密码 ?>20260127:Update: 重构页面加密脚本至 Ultimate 版本Security: 替换 MD5 为 HMAC-SHA256;增加 Cookie HttpOnly/Secure 属性;新增防暴力破解锁定机制(5次/15分钟)。Feat: 新增注销功能 (?action=logout);支持 Config 数组动态配置;解决表单重复提交问题。UI: 全新 Glassmorphism 毛玻璃风格界面,增加动态背景与交互动画,优化移动端显示。Fix: 修复 PHP 8.1+ FILTER_SANITIZE_STRING 弃用警告。<?php /** * PageEncrypt Ultimate - 全功能单页加密脚本 * 集成功能:防暴力破解、自动注销、动态配置、HMAC加密 * * 使用方法: * require_once('PageEncrypt.php'); * PageEncrypt('你的密码', [ * 'page_id' => 'my_private_page', * 'title' => '内部数据', * ]); */ // 默认加密盐 (建议在引用此文件前定义该常量,或者直接修改此处) if (!defined('MK_ENCRYPT_SALT')) { define('MK_ENCRYPT_SALT', 'Change_This_To_Something_Random_&_Complex_999'); } /** * 核心加密函数 * @param string $password 访问密码 * @param array $options 配置数组 */ function PageEncrypt($password, $options = []) { // 1. 初始化配置 $defaults = [ 'page_id' => 'default', // 页面ID,用于区分不同页面 'title' => '访问受限', // 页面标题 'cookie_time' => 86400 * 7, // Cookie有效期 (默认7天) 'max_attempts' => 5, // 最大尝试次数 'lockout_time' => 900, // 锁定时间 (秒),默认15分钟 'logout_param' => 'logout' // 触发退出的URL参数名 (?action=logout) ]; $config = array_merge($defaults, $options); // 生成唯一标识 $pageIdHash = md5($config['page_id']); $cookieName = 'mk_encrypt_' . $pageIdHash; $sessionKey = 'mk_encrypt_limit_' . $pageIdHash; // 开启 Session (用于防爆破) if (session_status() === PHP_SESSION_NONE) { session_start(); } // 计算正确密码的哈希 (HMAC-SHA256) $correctHash = hash_hmac('sha256', $password, MK_ENCRYPT_SALT); // 2. 处理退出登录逻辑 // 访问方式: yourpage.php?action=logout if (isset($_GET['action']) && $_GET['action'] === $config['logout_param']) { setcookie($cookieName, '', time() - 3600, '/'); // 清除Cookie // 清除URL参数并跳转回原页面 $cleanUrl = strtok($_SERVER["REQUEST_URI"], '?'); header("Location: " . $cleanUrl); exit(); } // 3. 检查防暴力破解限制 $attempts = $_SESSION[$sessionKey]['count'] ?? 0; $lastTime = $_SESSION[$sessionKey]['time'] ?? 0; $isLocked = false; if ($attempts >= $config['max_attempts']) { if (time() - $lastTime < $config['lockout_time']) { $isLocked = true; $remainingTime = ceil(($config['lockout_time'] - (time() - $lastTime)) / 60); $errorMsg = "尝试次数过多,请 {$remainingTime} 分钟后再试。"; } else { // 锁定时间已过,重置计数 unset($_SESSION[$sessionKey]); $attempts = 0; } } // 4. 验证 Cookie (如果未锁定) if (!$isLocked) { $cookiePwd = $_COOKIE[$cookieName] ?? ''; if (!empty($cookiePwd) && hash_equals($correctHash, $cookiePwd)) { // 验证通过,重置错误计数并返回 unset($_SESSION[$sessionKey]); return; } } // 5. 处理 POST 提交 (如果未锁定) if (!$isLocked && $_SERVER['REQUEST_METHOD'] === 'POST') { $inputPwd = $_POST['pagepwd'] ?? ''; // 验证密码 if (hash_equals($correctHash, hash_hmac('sha256', $inputPwd, MK_ENCRYPT_SALT))) { // 密码正确 setcookie($cookieName, $correctHash, [ 'expires' => time() + $config['cookie_time'], 'path' => '/', 'secure' => isset($_SERVER['HTTPS']) && $_SERVER['HTTPS'] === 'on', 'httponly' => true, 'samesite' => 'Strict' ]); // 登录成功,清空错误计数 unset($_SESSION[$sessionKey]); // 刷新页面 header("Location: " . strtok($_SERVER["REQUEST_URI"], '?')); exit(); } else { // 密码错误:记录次数 $_SESSION[$sessionKey] = [ 'count' => $attempts + 1, 'time' => time() ]; $errorMsg = "密码错误!剩余尝试次数: " . ($config['max_attempts'] - ($attempts + 1)); // 如果刚才是最后一次尝试,立即显示锁定 if (($attempts + 1) >= $config['max_attempts']) { $errorMsg = "尝试次数过多,已被锁定。"; $isLocked = true; } } } // 6. 渲染登录界面 // 如果执行到这里,说明没有通过验证,显示登录框并终止脚本 renderLoginForm($config['title'], $errorMsg ?? null, $isLocked); exit(); } /** * 渲染 HTML 界面 (Modern Glass UI) */ function renderLoginForm($title, $errorMsg, $isLocked) { header('Content-Type: text/html; charset=UTF-8'); ?> <!DOCTYPE html> <html lang="zh-CN"> <head> <meta charset="UTF-8"> <meta name="viewport" content="width=device-width, initial-scale=1.0, maximum-scale=1.0, user-scalable=no"> <title><?php echo htmlspecialchars($title); ?></title> <style> :root { --glass-bg: rgba(255, 255, 255, 0.75); --glass-border: rgba(255, 255, 255, 0.6); --primary-color: #4f46e5; --primary-hover: #4338ca; --text-main: #1f2937; --text-sub: #6b7280; --error-bg: #fee2e2; --error-text: #ef4444; } * { margin: 0; padding: 0; box-sizing: border-box; font-family: -apple-system, BlinkMacSystemFont, "Segoe UI", Roboto, "Helvetica Neue", Arial, sans-serif; } body { height: 100vh; width: 100%; display: flex; align-items: center; justify-content: center; /* 动态渐变背景 */ background: linear-gradient(-45deg, #ee7752, #e73c7e, #23a6d5, #23d5ab); background-size: 400% 400%; animation: gradientBG 15s ease infinite; overflow: hidden; } @keyframes gradientBG { 0% { background-position: 0% 50%; } 50% { background-position: 100% 50%; } 100% { background-position: 0% 50%; } } .container { position: relative; width: 100%; max-width: 420px; padding: 20px; } .glass-card { background: var(--glass-bg); backdrop-filter: blur(16px); -webkit-backdrop-filter: blur(16px); border: 1px solid var(--glass-border); border-radius: 24px; padding: 40px 32px; box-shadow: 0 8px 32px rgba(0, 0, 0, 0.1); text-align: center; transition: transform 0.3s ease; } .icon-wrapper { width: 64px; height: 64px; background: rgba(79, 70, 229, 0.1); border-radius: 50%; display: flex; align-items: center; justify-content: center; margin: 0 auto 20px; } .icon-wrapper svg { width: 32px; height: 32px; color: var(--primary-color); } h1 { font-size: 24px; font-weight: 700; color: var(--text-main); margin-bottom: 8px; letter-spacing: -0.5px; } p.subtitle { font-size: 14px; color: var(--text-sub); margin-bottom: 32px; } .input-group { position: relative; margin-bottom: 20px; } input { width: 100%; padding: 14px 16px; padding-left: 44px; border: 2px solid transparent; background: rgba(255, 255, 255, 0.6); border-radius: 12px; font-size: 16px; color: var(--text-main); transition: all 0.3s ease; outline: none; } input:focus { background: #fff; border-color: var(--primary-color); box-shadow: 0 0 0 4px rgba(79, 70, 229, 0.1); } input:disabled { background: #e5e7eb; cursor: not-allowed; } .input-icon { position: absolute; left: 14px; top: 50%; transform: translateY(-50%); color: #9ca3af; width: 20px; height: 20px; } input:focus + .input-icon { color: var(--primary-color); } button { width: 100%; padding: 14px; background: var(--primary-color); color: white; border: none; border-radius: 12px; font-size: 16px; font-weight: 600; cursor: pointer; transition: all 0.2s ease; box-shadow: 0 4px 6px -1px rgba(79, 70, 229, 0.2); } button:hover:not(:disabled) { background: var(--primary-hover); transform: translateY(-1px); box-shadow: 0 6px 8px -1px rgba(79, 70, 229, 0.3); } button:active:not(:disabled) { transform: translateY(0); } button:disabled { background: #9ca3af; cursor: not-allowed; opacity: 0.8; box-shadow: none; } .error-message { margin-top: 16px; padding: 10px; background: var(--error-bg); color: var(--error-text); font-size: 14px; border-radius: 8px; display: flex; align-items: center; justify-content: center; gap: 6px; animation: shake 0.5s cubic-bezier(.36,.07,.19,.97) both; } .footer { margin-top: 24px; font-size: 13px; } .footer a { color: var(--text-sub); text-decoration: none; transition: color 0.2s; } .footer a:hover { color: var(--primary-color); text-decoration: underline; } @keyframes shake { 10%, 90% { transform: translate3d(-1px, 0, 0); } 20%, 80% { transform: translate3d(2px, 0, 0); } 30%, 50%, 70% { transform: translate3d(-4px, 0, 0); } 40%, 60% { transform: translate3d(4px, 0, 0); } } /* 移动端优化 */ @media (max-width: 480px) { .glass-card { padding: 32px 24px; } h1 { font-size: 22px; } } </style> </head> <body> <div class="container"> <div class="glass-card"> <div class="icon-wrapper"> <svg viewBox="0 0 24 24" fill="none" stroke="currentColor" stroke-width="2" stroke-linecap="round" stroke-linejoin="round"> <rect x="3" y="11" width="18" height="11" rx="2" ry="2"></rect> <path d="M7 11V7a5 5 0 0 1 10 0v4"></path> </svg> </div> <h1><?php echo htmlspecialchars($title); ?></h1> <p class="subtitle">此页面内容受密码保护</p> <form method="post"> <div class="input-group"> <input type="password" name="pagepwd" placeholder="请输入访问密码" <?php echo $isLocked ? 'disabled' : 'autofocus'; ?> required autocomplete="current-password"> <svg class="input-icon" viewBox="0 0 24 24" fill="none" stroke="currentColor" stroke-width="2" stroke-linecap="round" stroke-linejoin="round"> <path d="M21 2l-2 2m-7.61 7.61a5.5 5.5 0 1 1-7.778 7.778 5.5 5.5 0 0 1 7.777-7.777zm0 0L15.5 7.5m0 0l3 3L22 7l-3-3m-3.5 3.5L19 4"></path> </svg> </div> <button type="submit" <?php echo $isLocked ? 'disabled' : ''; ?>> <?php echo $isLocked ? '暂时锁定' : '立即查看'; ?> </button> <?php if ($errorMsg): ?> <div class="error-message"> <svg width="16" height="16" viewBox="0 0 24 24" fill="none" stroke="currentColor" stroke-width="2" stroke-linecap="round" stroke-linejoin="round"> <circle cx="12" cy="12" r="10"></circle> <line x1="12" y1="8" x2="12" y2="12"></line> <line x1="12" y1="16" x2="12.01" y2="16"></line> </svg> <span><?php echo htmlspecialchars($errorMsg); ?></span> </div> <?php endif; ?> </form> <div class="footer"> <a href="/">← 返回首页</a> </div> </div> </div> </body> </html> <?php } ?>Ultimate版本基础用法跟原来一样,只需要一行密码即可,其他使用默认配置。<?php require_once('PageEncrypt.php'); PageEncrypt('mypassword123'); // 默认配置:5次机会,锁定15分钟 ?> <h1>欢迎访问加密页面</h1>高级用法:自定义标题和限制如果你想修改标题,或者让密码试错机会更多/更少。<?php require_once('PageEncrypt.php'); PageEncrypt('super_secret_pw', [ 'page_id' => 'admin_dashboard', // 必须设置,用于区分 Session 'title' => '管理员后台 - 请登录', 'max_attempts' => 3, // 只能错3次 'lockout_time' => 300, // 锁定 5 分钟 (300秒) 'cookie_time' => 3600 // 登录有效期 1 小时 ]); ?>如何添加“退出登录”按钮在你的加密页面内容中,添加一个链接即可:<h1>内部资料</h1> <p>这里是机密内容...</p> <a href="?action=logout" style="color: red;">[退出登录]</a>
 -
浏览器绕过“请在微信客户端打开链接” 场景简述安全技术人员在对微信小程序进行渗透测试的时候,不想打开安卓模拟器或者真机捉包测试。但想通过浏览器打开访问小程序的网站,配合捉包软件等做安全测试。但是偶尔有些小程序在浏览器访问的时候,会提示“请在微信客户端打开链接”。这时候就很懊恼,是吧?可以通过以下方法不用模拟器或者真机交互,也能实现浏览器捉取微信小程序的数据包。实现办法在开始前先思考一下,为什么会触发“请在微信客户端打开链接”。网页代码又是通过什么特征判断的?答:javascript通过判断Header头是不是微信+手机特征的User-Agent,从而实现区分当前环境是浏览器或者是手机微信端。那么既然是通过Header头从而实现的方法,那么我们在浏览器新建添加Header头,即可解决问题。1、键盘F12 ,控制台-鼠标点击,切换模式。2、编辑(Edit),设备(Devices),添加自定义设备(Add custom Device)。3、在设备当中命名为weixinua,添加User-Agent字段,保存。Mozilla/5.0 (Linux; Android 5.0; SM-N9100 Build/LRX21V) > AppleWebKit/537.36 (KHTML, like Gecko) Version/4.0 > Chrome/37.0.0.0 Mobile Safari/537.36 > MicroMessenger/6.0.2.56_r958800.520 NetType/WIFI4、选择设备尺寸为刚刚设定的weixinua,刷新访问页面即可看到小程序原本的页面,而非“请在微信客户端打开链接”。5、接着该干捉包就捉包吧,该测试就测试。
-
使用企业微信API获取个人微信的openid实现用户鉴权!无需认证公众号!完全免费! 在微信中,需要鉴别用户身份的常用做法是什么?当然是微信授权,获取用户的openid进行确认身份。如果是h5网页,那么需要使用微信公众号提供的网页授权接口实现,如果是小程序那就好办,个人小程序的 wx.login 接口也可以获取openid,那么问题来了,微信公众号提供的网页授权只有认证的服务号才有权限,个人根本没机会使用,这便是门槛。但是我发现,企业微信的接口,个人也可以使用网页授权链接实现获取用户的openid,即便你的网页不是在企业微信环境下使用,也是可以获取到用户的openid,本次文章就是我要实现的。准备1、登录企业微信;2、创建一个应用;3、创建完毕之后,进入应用,获取 AgentId 和 Secret4、获取 appid以上3个参数准备好,就可以用代码实现了。getCode.php<?php // 获取访问令牌的函数 function getAccessToken($corpid, $corpsecret) { $url = "https://qyapi.weixin.qq.com/cgi-bin/gettoken?corpid=$corpid&corpsecret=$corpsecret"; $response = file_get_contents($url); $data = json_decode($response, true); if(isset($data['access_token'])) { return $data['access_token']; } else { // 处理错误 return false; } } // 从数组中检索访问令牌的函数 function getCachedAccessToken() { if(file_exists('access_token.php')) { include 'access_token.php'; return $access_token_data['access_token']; } else { // 如果文件不存在,返回空字符串 return ''; } } // 检查访问令牌是否过期的函数 function isAccessTokenExpired() { if(file_exists('access_token.php')) { include 'access_token.php'; return $access_token_data['expires_at'] < time(); } else { // 如果文件不存在,返回 true 表示过期 return true; } } // 将访问令牌保存到数组中的函数 function saveAccessToken($access_token) { $access_token_data = array( 'access_token' => $access_token, // 设置访问令牌 'expires_at' => time() + 7200 // 设置过期时间为2小时后 ); file_put_contents('access_token.php', '<?php $access_token_data = ' . var_export($access_token_data, true) . ';'); } // 你的企业微信 API 凭证 $corpid = '你的企业微信appid'; $corpsecret = '你的企业微信所创建的应用的Secret'; // 检查访问令牌是否过期或未缓存 if(isAccessTokenExpired()) { // 从企业微信 API 获取新的访问令牌 $access_token = getAccessToken($corpid, $corpsecret); if($access_token) { // 将访问令牌保存到数组中 saveAccessToken($access_token); } else { // 处理错误 die("从企业微信 API 获取访问令牌失败。"); } } // 获取用户信息 function getUserInfo($access_token, $code) { $url = "https://qyapi.weixin.qq.com/cgi-bin/auth/getuserinfo?access_token=$access_token&code=$code"; $response = file_get_contents($url); $data = json_decode($response, true); return $data; } // 从数组中检索访问令牌 $access_token = getCachedAccessToken(); // code $code = $_GET['code']; $userInfo = getUserInfo($access_token, $code); if($userInfo['errcode'] == 0) { // 判断当前是userid还是openid if($userInfo['userid']) { // userid $openid = $userInfo['userid']; }else { // openid $openid = $userInfo['openid']; } // 跳转到展示页面 echo '<script>location.href="showOpenid.php?openid='.$openid.'";</script>'; }else { // 错误 echo $userInfo['errmsg']; } ?> <meta name="viewport" content="width=device-width,initial-scale=1.0,maximum-scale=1.0,user-scalable=0,viewport-fit=cover">以上代码两处需要配置,这两处已经在上面准备阶段获取到了。// 你的企业微信 API 凭证 $corpid = '你的企业微信appid'; $corpsecret = '你的企业微信所创建的应用的Secret';showOpenid.php<html> <head> <title>展示页面</title> <meta name="viewport" content="width=device-width,initial-scale=1.0,maximum-scale=1.0,user-scalable=0,viewport-fit=cover"> </head> <body> <p style="width:90%;margin: 50px auto 0;text-align:center;padding:20px 5px;border:2px dashed #ccc;"> <?php echo $_GET['openid']; ?> </p> </body> </html>以上两个php文件上传至你服务器即可。例如你的域名是:https://www.qq.com你将 getCode.php 和 showOpenid.php 上传至根目录下的 Auth 目录。那么继续往下看:构造网页授权链接根据官方API文档可知:构造格式如下:https://open.weixin.qq.com/connect/oauth2/authorize?appid=CORPID&redirect_uri=REDIRECT_URI&response_type=code&scope=snsapi_base&state=STATE&agentid=AGENTID#wechat_redirectCORPID: 替换为你的appidredirect_uri: 替换为getCode.php页面的链接AGENTID: 替换为你的AgentId假设你的CORPID是:ww1f1289a1254d49b2假设你的AGENTID是:1000002最终的网页授权链接如下:https://open.weixin.qq.com/connect/oauth2/authorize?appid=ww1f1289a1254d49b2&redirect_uri=https://www.qq.com/Auth/getCode.php&response_type=code&scope=snsapi_base&state=STATE&agentid=1000002#wechat_redirect还要去配置一下网页授权的域名(应用管理点进去往下拉-网页授权及JS-SDK)配置完授权域名后,也要配置信任IP,不然会提示你从不被允许的IP访问将构造完成的链接发到微信:点击即可获取到openid了!注意:如果你用登录企业微信的微信扫码,可能就不是获取到openid了,而是获取到userid,因为文档说了,当用户为企业成员时(无论是否在应用可见范围之内)返回示例如下:所以你要测试的话得找个不是你的企业微信成员的微信进行扫码,才可以看到openid,所以这一块要注意,你以后的业务逻辑也是需要对这一块进行特殊处理。
-
1.8w 字详解 SQL 优化 分享一篇关于SQL优化的硬核文章,全文有点长,建议收藏后慢慢看。很多朋友在做数据分析时,分析两分钟,跑数两小时?在使用SQL过程中不仅要关注数据结果,同样要注意SQL语句的执行效率。本文涉及三部分:SQL介绍SQL优化方法SQL优化实例1、MySQL的基本架构1)MySQL的基础架构图左边的client可以看成是客户端,客户端有很多,像我们经常你使用的CMD黑窗口,像我们经常用于学习的WorkBench,像企业经常使用的Navicat工具,它们都是一个客户端。右边的这一大堆都可以看成是Server(MySQL的服务端),我们将Server在细分为sql层和存储引擎层。当查询出数据以后,会返回给执行器。执行器一方面将结果写到查询缓存里面,当你下次再次查询的时候,就可以直接从查询缓存中获取到数据了。另一方面,直接将结果响应回客户端。2)查询数据库的引擎① show engines;② show variables like “%storage_engine%”;3)指定数据库对象的存储引擎create table tb( id int(4) auto_increment, name varchar(5), dept varchar(5), primary key(id) ) engine=myISAM auto_increment=1 default charset=utf8;SQL优化1)为什么需要进行SQL优化?在进行多表连接查询、子查询等操作的时候,由于你写出的SQL语句欠佳,导致的服务器执行时间太长,我们等待结果的时间太长。基于此,我们需要学习怎么优化SQL。2)mysql的编写过程和解析过程① 编写过程select dinstinct ..from ..join ..on ..where ..group by ..having ..order by ..limit ..② 解析过程from .. on.. join ..where ..group by ..having ..select dinstinct ..order by ..limit ..提供一个网站,详细说明了mysql解析过程:https://www.cnblogs.com/annsshadow/p/5037667.html3)SQL优化—主要就是优化索引优化SQL,最重要的就是优化SQL索引。索引相当于字典的目录。利用字典目录查找汉字的过程,就相当于利用SQL索引查找某条记录的过程。有了索引,就可以很方便快捷的定位某条记录。① 什么是索引?索引就是帮助MySQL高效获取数据的一种【数据结构】。索引是一种树结构,MySQL中一般用的是【B+树】。② 索引图示说明(这里用二叉树来帮助我们理解索引)树形结构的特点是:子元素比父元素小的,放在左侧;子元素比父元素大的,放在右侧。这个图示只是为了帮我们简单理解索引的,真实的关于【B+树】的说明,我们会在下面进行说明。索引是怎么查找数据的呢?两个字【指向】,上图中我们给age列指定了一个索引,即类似于右侧的这种树形结构。mysql表中的每一行记录都有一个硬件地址,例如索引中的age=50,指向的就是源表中该行的标识符(“硬件地址”)。也就是说,树形索引建立了与源表中每行记录硬件地址的映射关系,当你指定了某个索引,这种映射关系也就建成了,这就是为什么我们可以通过索引快速定位源表中记录的原因。以【select * from student where age=33】查询语句为例。当我们不加索引的时候,会从上到下扫描源表,当扫描到第5行的时候,找到了我们想要找到了元素,一共是查询了5次。当添加了索引以后,就直接在树形结构中进行查找,33比50小,就从左侧查询到了23,33大于23,就又查询到了右侧,这下找到了33,整个索引结束,一共进行了3次查找。是不是很方便,假如我们此时需要查找age=62,你再想想“添加索引”前后,查找次数的变化情况。4)索引的弊端1.当数据量很大的时候,索引也会很大(当然相比于源表来说,还是相当小的),也需要存放在内存/硬盘中(通常存放在硬盘中),占据一定的内存空间/物理空间。2.索引并不适用于所有情况:a.少量数据;b.频繁进行改动的字段,不适合做索引;c.很少使用的字段,不需要加索引;3.索引会提高数据查询效率,但是会降低“增、删、改”的效率。当不使用索引的时候,我们进行数据的增删改,只需要操作源表即可,但是当我们添加索引后,不仅需要修改源表,也需要再次修改索引,很麻烦。尽管是这样,添加索引还是很划算的,因为我们大多数使用的就是查询,“查询”对于程序的性能影响是很大的。5)索引的优势1.提高查询效率(降低了IO使用率)。当创建了索引后,查询次数减少了。2.降低CPU使用率。比如说【…order by age desc】这样一个操作,当不加索引,会把源表加载到内存中做一个排序操作,极大的消耗了资源。但是使用了索引以后,第一索引本身就小一些,第二索引本身就是排好序的,左边数据最小,右边数据最大。6)B+树图示说明MySQL中索引使用的就是B+树结构。关于B+树的说明:首先,Btree一般指的都是【B+树】,数据全部存放在叶子节点中。对于上图来说,最下面的第3层,属于叶子节点,真实数据部份都是存放在叶子节点当中的。那么对于第1、2层中的数据又是干嘛的呢?答:用于分割指针块儿的,比如说小于26的找P1,介于26-30之间的找P2,大于30的找P3。其次,三层【B+树】可以存放上百万条数据。这么多数据怎么放的呢?增加“节点数”。图中我们只有三个节点。最后,【B+树】中查询任意数据的次数,都是n次,n表示的是【B+树】的高度。3、索引的分类与创建1)索引分类单值索引唯一索引复合索引① 单值索引利用表中的某一个字段创建单值索引。一张表中往往有多个字段,也就是说每一列其实都可以创建一个索引,这个根据我们实际需求来进行创建。还需要注意的一点就是,一张表可以创建多个“单值索引”。假如某一张表既有age字段,又有name字段,我们可以分别对age、name创建一个单值索引,这样一张表就有了两个单值索引。② 唯一索引也是利用表中的某一个字段创建单值索引,与单值索引不同的是:创建唯一索引的字段中的数据,不能有重复值。像age肯定有很多人的年龄相同,像name肯定有些人是重名的,因此都不适合创建“唯一索引”。像编号id、学号sid,对于每个人都不一样,因此可以用于创建唯一索引。③ 复合索引多个列共同构成的索引。比如说我们创建这样一个“复合索引”(name,age),先利用name进行索引查询,当name相同的时候,我们利用age再进行一次筛选。注意:复合索引的字段并不是非要都用完,当我们利用name字段索引出我们想要的结果以后,就不需要再使用age进行再次筛选了。2)创建索引① 语法语法:create 索引类型 索引名 on 表(字段);建表语句如下:查询表结构如下:② 创建索引的第一种方式Ⅰ 创建单值索引create index dept_index on tb(dept);Ⅱ 创建唯一索引:这里我们假定name字段中的值都是唯一的create unique index name_index on tb(name);Ⅲ 创建复合索引create index dept_name_index on tb(dept,name);③ 创建索引的第二种方式先删除之前创建的索引以后,再进行这种创建索引方式的测试;语法:alter table 表名 add 索引类型 索引名(字段)Ⅰ 创建单值索引alter table tb add index dept_index(dept);Ⅱ 创建唯一索引:这里我们假定name字段中的值都是唯一的alter table tb add unique index name_index(name);Ⅲ 创建复合索引alter table tb add index dept_name_index(dept,name);④ 补充说明如果某个字段是primary key,那么该字段默认就是主键索引。主键索引和唯一索引非常相似。相同点:该列中的数据都不能有相同值;不同点:主键索引不能有null值,但是唯一索引可以有null值。3)索引删除和索引查询① 索引删除语法:drop index 索引名 on 表名;drop index name_index on tb;② 索引查询语法:show index from 表名;show index from tb;结果如下:4、SQL性能问题的探索人为优化: 需要我们使用explain分析SQL的执行计划。该执行计划可以模拟SQL优化器执行SQL语句,可以帮助我们了解到自己编写SQL的好坏。SQL优化器自动优化: 最开始讲述MySQL执行原理的时候,我们已经知道MySQL有一个优化器,当你写了一个SQL语句的时候,SQL优化器如果认为你写的SQL语句不够好,就会自动写一个好一些的等价SQL去执行。SQL优化器自动优化功能【会干扰】我们的人为优化功能。当我们查看了SQL执行计划以后,如果写的不好,我们会去优化自己的SQL。当我们以为自己优化的很好的时候,最终的执行计划,并不是按照我们优化好的SQL语句来执行的,而是有时候将我们优化好的SQL改变了,去执行。SQL优化是一种概率问题,有时候系统会按照我们优化好的SQL去执行结果(优化器觉得你写的差不多,就不会动你的SQL)。有时候优化器仍然会修改我们优化好的SQL,然后再去执行。1)查看执行计划语法:explain + SQL语句eg:explain select * from tb;2)“执行计划”中需要知道的几个“关键字”id :编号select_type :查询类型table :表type :类型possible_keys :预测用到的索引key :实际使用的索引key_len :实际使用索引的长度ref :表之间的引用rows :通过索引查询到的数据量Extra :额外的信息建表语句和插入数据:# 建表语句 create table course ( cid int(3), cname varchar(20), tid int(3) ); create table teacher ( tid int(3), tname varchar(20), tcid int(3) ); create table teacherCard ( tcid int(3), tcdesc varchar(200) ); # 插入数据 insert into course values(1,'java',1); insert into course values(2,'html',1); insert into course values(3,'sql',2); insert into course values(4,'web',3); insert into teacher values(1,'tz',1); insert into teacher values(2,'tw',2); insert into teacher values(3,'tl',3); insert into teacherCard values(1,'tzdesc') ; insert into teacherCard values(2,'twdesc') ; insert into teacherCard values(3,'tldesc') ;explain执行计划常用关键字详解1)id关键字的使用说明① 案例:查询课程编号为2 或 教师证编号为3 的老师信息:# 查看执行计划 explain select t.* from teacher t,course c,teacherCard tc where t.tid = c.tid and t.tcid = tc.tcid and (c.cid = 2 or tc.tcid = 3);结果如下:接着,在往teacher表中增加几条数据。insert into teacher values(4,'ta',4); insert into teacher values(5,'tb',5); insert into teacher values(6,'tc',6);再次查看执行计划。# 查看执行计划 explain select t.* from teacher t,course c,teacherCard tc where t.tid = c.tid and t.tcid = tc.tcid and (c.cid = 2 or tc.tcid = 3);结果如下:表的执行顺序 ,因表数量改变而改变的原因:笛卡尔积。a b c 2 3 4 最终:2 * 3 * 4 = 6 * 4 = 24 c b a 4 3 2 最终:4 * 3 * 2 = 12 * 2 = 24分析:最终执行的条数,虽然是一致的。但是中间过程,有一张临时表是6,一张临时表是12,很明显6 < 12,对于内存来说,数据量越小越好,因此优化器肯定会选择第一种执行顺序。结论:id值相同,从上往下顺序执行。表的执行顺序因表数量的改变而改变。② 案例:查询教授SQL课程的老师的描述(desc)# 查看执行计划 explain select tc.tcdesc from teacherCard tc where tc.tcid = ( select t.tcid from teacher t where t.tid = (select c.tid from course c where c.cname = 'sql') );结果如下:结论:id值不同,id值越大越优先查询。这是由于在进行嵌套子查询时,先查内层,再查外层。③ 针对②做一个简单的修改# 查看执行计划 explain select t.tname ,tc.tcdesc from teacher t,teacherCard tc where t.tcid= tc.tcid and t.tid = (select c.tid from course c where cname = 'sql') ;结果如下:结论:id值有相同,又有不同。id值越大越优先;id值相同,从上往下顺序执行。2)select_type关键字的使用说明:查询类型① simple:简单查询不包含子查询,不包含union查询。explain select * from teacher;结果如下:② primary:包含子查询的主查询(最外层)③ subquery:包含子查询的主查询(非最外层)④ derived:衍生查询(用到了临时表)a.在from子查询中,只有一张表;b.在from子查询中,如果table1 union table2,则table1就是derived表;explain select cr.cname from ( select * from course where tid = 1 union select * from course where tid = 2 ) cr ;结果如下:⑤ union:union之后的表称之为union表,如上例⑥ union result:告诉我们,哪些表之间使用了union查询3)type关键字的使用说明:索引类型system、const只是理想状况,实际上只能优化到index --> range --> ref这个级别。要对type进行优化的前提是,你得创建索引。① system源表只有一条数据(实际中,基本不可能);衍生表只有一条数据的主查询(偶尔可以达到)。② const仅仅能查到一条数据的SQL ,仅针对Primary key或unique索引类型有效。explain select tid from test01 where tid =1 ;结果如下:删除以前的主键索引后,此时我们添加一个其他的普通索引:create index test01_index on test01(tid) ; # 再次查看执行计划 explain select tid from test01 where tid =1 ;结果如下:③ eq_ref唯一性索引,对于每个索引键的查询,返回匹配唯一行数据(有且只有1个,不能多 、不能0),并且查询结果和数据条数必须一致。此种情况常见于唯一索引和主键索引。delete from teacher where tcid >= 4; alter table teacherCard add constraint pk_tcid primary key(tcid); alter table teacher add constraint uk_tcid unique index(tcid) ; explain select t.tcid from teacher t,teacherCard tc where t.tcid = tc.tcid ;结果如下:总结:以上SQL,用到的索引是t.tcid,即teacher表中的tcid字段;如果teacher表的数据个数和连接查询的数据个数一致(都是3条数据),则有可能满足eq_ref级别;否则无法满足。条件很苛刻,很难达到。④ ref非唯一性索引,对于每个索引键的查询,返回匹配的所有行(可以0,可以1,可以多)准备数据:创建索引,并查看执行计划:# 添加索引 alter table teacher add index index_name (tname) ; # 查看执行计划 explain select * from teacher where tname = 'tz';结果如下:⑤ range检索指定范围的行 ,where后面是一个范围查询(between, >, <, >=, in)in有时候会失效,从而转为无索引时候的ALL# 添加索引 alter table teacher add index tid_index (tid) ; # 查看执行计划:以下写了一种等价SQL写法,查看执行计划 explain select t.* from teacher t where t.tid in (1,2) ; explain select t.* from teacher t where t.tid <3 ;结果如下:⑥ index查询全部索引中的数据(扫描整个索引)⑦ ALL查询全部源表中的数据(暴力扫描全表)注意:cid是索引字段,因此查询索引字段,只需要扫描索引表即可。但是tid不是索引字段,查询非索引字段,需要暴力扫描整个源表,会消耗更多的资源。4)possible_keys和keypossible_keys可能用到的索引。是一种预测,不准。了解一下就好。key指的是实际使用的索引。# 先给course表的cname字段,添加一个索引 create index cname_index on course(cname); # 查看执行计划 explain select t.tname ,tc.tcdesc from teacher t,teacherCard tc where t.tcid= tc.tcid and t.tid = (select c.tid from course c where cname = 'sql') ;结果如下:有一点需要注意的是:如果possible_key/key是NULL,则说明没用索引。5)key_len索引的长度,用于判断复合索引是否被完全使用(a,b,c)。① 新建一张新表,用于测试# 创建表 create table test_kl ( name char(20) not null default '' ); # 添加索引 alter table test_kl add index index_name(name) ; # 查看执行计划 explain select * from test_kl where name ='' ; 结果如下:结果分析:因为我没有设置服务端的字符集,因此默认的字符集使用的是latin1,对于latin1一个字符代表一个字节,因此这列的key_len的长度是20,表示使用了name这个索引。② 给test_kl表,新增name1列,该列没有设置“not null”结果如下:结果分析:如果索引字段可以为null,则mysql底层会使用1个字节用于标识。③ 删除原来的索引name和name1,新增一个复合索引# 删除原来的索引name和name1 drop index index_name on test_kl ; drop index index_name1 on test_kl ; # 增加一个复合索引 create index name_name1_index on test_kl(name,name1); # 查看执行计划 explain select * from test_kl where name1 = '' ; --121 explain select * from test_kl where name = '' ; --60结果如下:结果分析: 对于下面这个执行计划,可以看到我们只使用了复合索引的第一个索引字段name,因此key_len是20,这个很清楚。再看上面这个执行计划,我们虽然仅仅在where后面使用了复合索引字段中的name1字段,但是你要使用复合索引的第2个索引字段,会默认使用了复合索引的第1个索引字段name,由于name1可以是null,因此key_len = 20 + 20 + 1 = 41呀!④ 再次怎加一个name2字段,并为该字段创建一个索引。不同的是:该字段数据类型是varchar# 新增一个字段name2,name2可以为null alter table test_kl add column name2 varchar(20) ; # 给name2字段,设置为索引字段 alter table test_kl add index name2_index(name2) ; # 查看执行计划 explain select * from test_kl where name2 = '' ; 结果如下:结果分析: key_len = 20 + 1 + 2,这个20 + 1我们知道,这个2又代表什么呢?原来varchar属于可变长度,在mysql底层中,用2个字节标识可变长度。6)ref这里的ref的作用,指明当前表所参照的字段。注意与type中的ref值区分。在type中,ref只是type类型的一种选项值。# 给course表的tid字段,添加一个索引 create index tid_index on course(tid); # 查看执行计划 explain select * from course c,teacher t where c.tid = t.tid and t.tname = 'tw';结果如下:结果分析: 有两个索引,c表的c.tid引用的是t表的tid字段,因此可以看到显示结果为【数据库名.t.tid】,t表的t.name引用的是一个常量"tw",因此可以看到结果显示为const,表示一个常量。7)rows(这个目前还是有点疑惑)被索引优化查询的数据个数 (实际通过索引而查询到的数据个数)explain select * from course c,teacher t where c.tid = t.tid and t.tname = 'tz' ;结果如下:8)extra表示其他的一些说明,也很有用。① using filesort:针对单索引的情况当出现了这个词,表示你当前的SQL性能消耗较大。表示进行了一次“额外”的排序。常见于order by语句中。Ⅰ 什么是“额外”的排序?为了讲清楚这个,我们首先要知道什么是排序。我们为了给某一个字段进行排序的时候,首先你得先查询到这个字段,然后在将这个字段进行排序。紧接着,我们查看如下两个SQL语句的执行计划。# 新建一张表,建表同时创建索引 create table test02 ( a1 char(3), a2 char(3), a3 char(3), index idx_a1(a1), index idx_a2(a2), index idx_a3(a3) ); # 查看执行计划 explain select * from test02 where a1 ='' order by a1 ; explain select * from test02 where a1 ='' order by a2 ; 结果如下:结果分析: 对于第一个执行计划,where后面我们先查询了a1字段,然后再利用a1做了依次排序,这个很轻松。但是对于第二个执行计划,where后面我们查询了a1字段,然而利用的却是a2字段进行排序,此时myql底层会进行一次查询,进行“额外”的排序。总结:对于单索引,如果排序和查找是同一个字段,则不会出现using filesort;如果排序和查找不是同一个字段,则会出现using filesort;因此where哪些字段,就order by哪些些字段。② using filesort:针对复合索引的情况不能跨列(官方术语:最佳左前缀)# 删除test02的索引 drop index idx_a1 on test02; drop index idx_a2 on test02; drop index idx_a3 on test02; # 创建一个复合索引 alter table test02 add index idx_a1_a2_a3 (a1,a2,a3) ; # 查看下面SQL语句的执行计划 explain select *from test02 where a1='' order by a3 ; --using filesort explain select *from test02 where a2='' order by a3 ; --using filesort explain select *from test02 where a1='' order by a2 ;结果如下:结果分析: 复合索引的顺序是(a1,a2,a3),可以看到a1在最左边,因此a1就叫做“最佳左前缀”,如果要使用后面的索引字段,必须先使用到这个a1字段。对于explain1,where后面我们使用a1字段,但是后面的排序使用了a3,直接跳过了a2,属于跨列;对于explain2,where后面我们使用了a2字段,直接跳过了a1字段,也属于跨列;对于explain3,where后面我们使用a1字段,后面使用的是a2字段,因此没有出现【using filesort】。③ using temporary当出现了这个词,也表示你当前的SQL性能消耗较大。这是由于当前SQL用到了临时表。一般出现在group by中。explain select a1 from test02 where a1 in ('1','2','3') group by a1 ; explain select a1 from test02 where a1 in ('1','2','3') group by a2 ; --using temporary结果如下:结果分析: 当你查询哪个字段,就按照那个字段分组,否则就会出现using temporary。针对using temporary,我们在看一个例子:using temporary表示需要额外再使用一张表,一般出现在group by语句中。虽然已经有表了,但是不适用,必须再来一张表。再次来看mysql的编写过程和解析过程。Ⅰ 编写过程select dinstinct ..from ..join ..on ..where ..group by ..having ..order by ..limit ..Ⅱ 解析过程from .. on.. join ..where ..group by ..having ..select dinstinct ..order by ..limit ..很显然,where后是group by,然后才是select。基于此,我们再查看如下两个SQL语句的执行计划。explain select * from test03 where a2=2 and a4=4 group by a2,a4; explain select * from test03 where a2=2 and a4=4 group by a3;分析如下: 对于第一个执行计划,where后面是a2和a4,接着我们按照a2和a4分组,很明显这两张表已经有了,直接在a2和a4上分组就行了。但是对于第二个执行计划,where后面是a2和a4,接着我们却按照a3分组,很明显我们没有a3这张表,因此有需要再来一张临时表a3。因此就会出现using temporary。④ using index当你看到这个关键词,恭喜你,表示你的SQL性能提升了。using index称之为“索引覆盖”。当出现了using index,就表示不用读取源表,而只利用索引获取数据,不需要回源表查询。只要使用到的列,全部出现在索引中,就是索引覆盖。# 删除test02中的复合索引idx_a1_a2_a3 drop index idx_a1_a2_a3 on test02; # 重新创建一个复合索引 idx_a1_a2create index idx_a1_a2 on test02(a1,a2); # 查看执行计划 explain select a1,a3 from test02 where a1='' or a3= '' ; explain select a1,a2 from test02 where a1='' and a2= '' ;结果如下:结果分析: 我们创建的是a1和a2的复合索引,对于第一个执行计划,我们却出现了a3,该字段并没有创建索引,因此没有出现using index,而是using where,表示我们需要回表查询。对于第二个执行计划,属于完全的索引覆盖,因此出现了using index。针对using index,我们在查看一个案例:explain select a1,a2 from test02 where a1='' or a2= '' ; explain select a1,a2 from test02;结果如下:如果用到了索引覆盖(using index时),会对possible_keys和key造成影响:a.如果没有where,则索引只出现在key中;b.如果有where,则索引 出现在key和possible_keys中。⑤ using where表示需要【回表查询】,表示既在索引中进行了查询,又回到了源表进行了查询。# 删除test02中的复合索引idx_a1_a2 drop index idx_a1_a2 on test02; # 将a1字段,新增为一个索引 create index a1_index on test02(a1); # 查看执行计划 explain select a1,a3 from test02 where a1="" and a3="" ;结果如下:结果分析: 我们既使用了索引a1,表示我们使用了索引进行查询。但是又对于a3字段,我们并没有使用索引,因此对于a3字段,需要回源表查询,这个时候出现了using where。⑥ impossible where(了解)当where子句永远为False的时候,会出现impossible where# 查看执行计划 explain select a1 from test02 where a1="a" and a1="b" ;结果如下:6、优化示例1)引入案例# 创建新表 create table test03 ( a1 int(4) not null, a2 int(4) not null, a3 int(4) not null, a4 int(4) not null ); # 创建一个复合索引 create index a1_a2_a3_test03 on test03(a1,a2,a3); # 查看执行计划 explain select a3 from test03 where a1=1 and a2=2 and a3=3;结果如下:推荐写法: 复合索引顺序和使用顺序一致。下面看看【不推荐写法】:复合索引顺序和使用顺序不一致。# 查看执行计划 explain select a3 from test03 where a3=1 and a2=2 and a1=3;结果如下:结果分析: 虽然结果和上述结果一致,但是不推荐这样写。但是这样写怎么又没有问题呢?这是由于SQL优化器的功劳,它帮我们调整了顺序。最后再补充一点:对于复合索引,不要跨列使用# 查看执行计划 explain select a3 from test03 where a1=1 and a3=2 group by a3;结果如下:结果分析: a1_a2_a3是一个复合索引,我们使用a1索引后,直接跨列使用了a3,直接跳过索引a2,因此索引a3失效了,当使用a3进行分组的时候,就会出现using where。2)单表优化# 创建新表 create table book ( bid int(4) primary key, name varchar(20) not null, authorid int(4) not null, publicid int(4) not null, typeid int(4) not null ); # 插入数据 insert into book values(1,'tjava',1,1,2) ; insert into book values(2,'tc',2,1,2) ; insert into book values(3,'wx',3,2,1) ; insert into book values(4,'math',4,2,3) ; 结果如下:案例:查询authorid=1且typeid为2或3的bid,并根据typeid降序排列。explain select bid from book where typeid in(2,3) and authorid=1 order by typeid desc ; 结果如下:这是没有进行任何优化的SQL,可以看到typ为ALL类型,extra为using filesort,可以想象这个SQL有多恐怖。优化:添加索引的时候,要根据MySQL解析顺序添加索引,又回到了MySQL的解析顺序,下面我们再来看看MySQL的解析顺序。from .. on.. join ..where ..group by ..having ..select dinstinct ..order by ..limit ..① 优化1:基于此,我们进行索引的添加,并再次查看执行计划。# 添加索引 create index typeid_authorid_bid on book(typeid,authorid,bid); # 再次查看执行计划 explain select bid from book where typeid in(2,3) and authorid=1 order by typeid desc ;结果如下:结果分析: 结果并不是和我们想象的一样,还是出现了using where,查看索引长度key_len=8,表示我们只使用了2个索引,有一个索引失效了。② 优化2:使用了in有时候会导致索引失效,基于此有了如下一种优化思路。将in字段放在最后面。需要注意一点:每次创建新的索引的时候,最好是删除以前的废弃索引,否则有时候会产生干扰(索引之间)。# 删除以前的索引 drop index typeid_authorid_bid on book; # 再次创建索引 create index authorid_typeid_bid on book(authorid,typeid,bid); # 再次查看执行计划 explain select bid from book where authorid=1 and typeid in(2,3) order by typeid desc ;结果如下:结果分析: 这里虽然没有变化,但是这是一种优化思路。总结如下:a.最佳做前缀,保持索引的定义和使用的顺序一致性b.索引需要逐步优化(每次创建新索引,根据情况需要删除以前的废弃索引)c.将含In的范围查询,放到where条件的最后,防止失效。本例中同时出现了Using where(需要回原表); Using index(不需要回原表):原因,where authorid=1 and typeid in(2,3)中authorid在索引(authorid,typeid,bid)中,因此不需要回原表(直接在索引表中能查到);而typeid虽然也在索引(authorid,typeid,bid)中,但是含in的范围查询已经使该typeid索引失效,因此相当于没有typeid这个索引,所以需要回原表(using where);例如以下没有了In,则不会出现using where:explain select bid from book where authorid=1 and typeid =3 order by typeid desc ;结果如下:3)两表优化# 创建teacher2新表 create table teacher2 ( tid int(4) primary key, cid int(4) not null ); # 插入数据 insert into teacher2 values(1,2); insert into teacher2 values(2,1); insert into teacher2 values(3,3); # 创建course2新表 create table course2 ( cid int(4) , cname varchar(20) ); # 插入数据 insert into course2 values(1,'java'); insert into course2 values(2,'python'); insert into course2 values(3,'kotlin');案例:使用一个左连接,查找教java课程的所有信息。explain select * from teacher2 t left outer join course2 c on t.cid=c.cid where c.cname='java';结果如下:① 优化对于两张表,索引往哪里加?答:对于表连接,小表驱动大表。索引建立在经常使用的字段上。为什么小表驱动大表好一些呢? 小表:10 大表:300 # 小表驱动大表 select ...where 小表.x10=大表.x300 ; for(int i=0;i<小表.length10;i++) { for(int j=0;j<大表.length300;j++) { ... } } # 大表驱动小表 select ...where 大表.x300=小表.x10 ; for(int i=0;i<大表.length300;i++) { for(int j=0;j<小表.length10;j++) { ... } }分析: 以上2个FOR循环,最终都会循环3000次;但是对于双层循环来说:一般建议,将数据小的循环,放外层。数据大的循环,放内层。不用管这是为什么,这是编程语言的一个原则,对于双重循环,外层循环少,内存循环大,程序的性能越高。结论:当编写【…on t.cid=c.cid】时,将数据量小的表放左边(假设此时t表数据量小,c表数据量大。)我们已经知道了,对于两表连接,需要利用小表驱动大表,例如【…on t.cid=c.cid】,t如果是小表(10条),c如果是大表(300条),那么t每循环1次,就需要循环300次,即t表的t.cid字段属于,经常使用的字段,因此需要给cid字段添加索引。更深入的说明: 一般情况下,左连接给左表加索引。右连接给右表加索引。其他表需不需要加索引,我们逐步尝试。# 给左表的字段加索引 create index cid_teacher2 on teacher2(cid); # 查看执行计划 explain select * from teacher2 t left outer join course2 c on t.cid=c.cid where c.cname='java';结果如下:当然你可以下去接着优化,给cname添加一个索引。索引优化是一个逐步的过程,需要一点点尝试。# 给cname的字段加索引 create index cname_course2 on course2(cname); # 查看执行计划 explain select t.cid,c.cname from teacher2 t left outer join course2 c on t.cid=c.cid where c.cname='java';结果如下:最后补充一个:Using join buffer是extra中的一个选项,表示Mysql引擎使用了“连接缓存”,即MySQL底层动了你的SQL,你写的太差了。4)三表优化大于等于张表,优化原则一样小表驱动大表索引建立在经常查询的字段上7、避免索引失效的一些原则① 复合索引需要注意的点复合索引,不要跨列或无序使用(最佳左前缀)复合索引,尽量使用全索引匹配,也就是说,你建立几个索引,就使用几个索引② 不要在索引上进行任何操作(计算、函数、类型转换),否则索引失效explain select * from book where authorid = 1 and typeid = 2; explain select * from book where authorid*2 = 1 and typeid = 2 ;结果如下:③ 索引不能使用不等于(!= <>)或is null (is not null),否则自身以及右侧所有全部失效(针对大多数情况)。复合索引中如果有>,则自身和右侧索引全部失效。# 针对不是复合索引的情况 explain select * from book where authorid != 1 and typeid =2 ; explain select * from book where authorid != 1 and typeid !=2 ;结果如下:再观看下面这个案例:# 删除单独的索引 drop index authorid_index on book; drop index typeid_index on book; # 创建一个复合索引 alter table book add index idx_book_at (authorid,typeid); # 查看执行计划 explain select * from book where authorid > 1 and typeid = 2 ; explain select * from book where authorid = 1 and typeid > 2 ;结果如下:结论:复合索引中如果有【>】,则自身和右侧索引全部失效。在看看复合索引中有【<】的情况:我们学习索引优化 ,是一个大部分情况适用的结论,但由于SQL优化器等原因 该结论不是100%正确。一般而言, 范围查询(> < in),之后的索引失效。④ SQL优化,是一种概率层面的优化。至于是否实际使用了我们的优化,需要通过explain进行推测。# 删除复合索引 drop index authorid_typeid_bid on book; # 为authorid和typeid,分别创建索引 create index authorid_index on book(authorid); create index typeid_index on book(typeid); # 查看执行计划 explain select * from book where authorid = 1 and typeid =2 ;结果如下:结果分析: 我们创建了两个索引,但是实际上只使用了一个索引。因为对于两个单独的索引,程序觉得只用一个索引就够了,不需要使用两个。当我们创建一个复合索引,再次执行上面的SQL:# 查看执行计划 explain select * from book where authorid = 1 and typeid =2 ;结果如下:⑤ 索引覆盖,百分之百没问题⑥ like尽量以“常量”开头,不要以’%'开头,否则索引失效explain select * from teacher where tname like "%x%" ; explain select * from teacher where tname like 'x%'; explain select tname from teacher where tname like '%x%';结果如下:结论如下: like尽量不要使用类似"%x%"情况,但是可以使用"x%"情况。如果非使用 "%x%"情况,需要使用索引覆盖。⑦ 尽量不要使用类型转换(显示、隐式),否则索引失效explain select * from teacher where tname = 'abc' ; explain select * from teacher where tname = 123 ;结果如下:⑧ 尽量不要使用or,否则索引失效explain select * from teacher where tname ='' and tcid >1 ; explain select * from teacher where tname ='' or tcid >1 ;结果如下:注意:or很猛,会让自身索引和左右两侧的索引都失效。8、一些其他的优化方法1)exists和in的优化如果主查询的数据集大,则使用i关键字,效率高。如果子查询的数据集大,则使用exist关键字,效率高。select ..from table where exist (子查询) ; select ..from table where 字段 in (子查询) ;2)order by优化IO就是访问硬盘文件的次数using filesort 有两种算法:双路排序、单路排序(根据IO的次数)MySQL4.1之前默认使用双路排序;双路:扫描2次磁盘(1:从磁盘读取排序字段,对排序字段进行排序(在buffer中进行的排序)2:扫描其他字段)MySQL4.1之后默认使用单路排序:只读取一次(全部字段),在buffer中进行排序。但种单路排序会有一定的隐患(不一定真的是“单路/1次IO”,有可能多次IO)。原因:如果数据量特别大,则无法将所有字段的数据一次性读取完毕,因此会进行“分片读取、多次读取”。注意:单路排序 比双路排序 会占用更多的buffer。单路排序在使用时,如果数据大,可以考虑调大buffer的容量大小:# 不一定真的是“单路/1次IO”,有可能多次IO set max_length_for_sort_data = 1024 如果max_length_for_sort_data值太低,则mysql会自动从 单路->双路(太低:需要排序的列的总大小超过了max_length_for_sort_data定义的字节数)① 提高order by查询的策略:选择使用单路、双路 ;调整buffer的容量大小避免使用select …(select后面写所有字段,也比写效率高)复合索引,不要跨列使用 ,避免using filesort保证全部的排序字段,排序的一致性(都是升序或降序)
-
如何免费接入CloudFlare for SaaS并解决DNS接入限制问题? CloudFlare禁用了Partner使用以来,博主一直想接入CloudFlare,但由于是DNS的方式接入不得不放弃。无意间看到可以官方免费CNAME方式接入CloudFlare的方法,二话不说,直接上!这是官方的CloudFlare for SaaS提供的一种更灵活的CNAME接入方式,上教程。一、准备阶段两个域名外币卡或者已绑卡的PayPal(虚拟卡也可以,自己去申请)你的源站二、配置接入订阅CloudFlare for SaaS打开一个已经使用CloudFlare的域名,选择【SSL/TLS】-【自定义主机名】-【启用CloudFlare for SaaS】后根据它的提示绑定外币卡或者已绑卡的PayPal。来到激活页面,从提示可以看出免费额度已经进行更新,可以放心使用。设置源站首先在【DNS】下把你想要用到域名解析好你的源站,比如origin.a.com在【SSL/TLS】下的【自定义主机名】,首先要设置回退源,就是刚刚解析好的origin.a.com,点击【Add Fallback Origin】后刷新显示有效即可如果需要每个域名设置一个源站的话,这是要收费的。所以这里我们只设置一个源站。添加自定义主机名点击【添加自定义主机名】,输入你想要添加的未在CF接入的子域名(就是你准备的第二个域名),比如:example.b.com。建议直接使用TXT验证。验证域名所有权按照要求解析好两个TXT记录,解析生效后10分钟左右即可验证通过。证书状态与主机状态显示有效即可。SaaS域名解析添加进去的SaaS域名,CF并不会给你提供明确的CNAME供指向。上述方式接入的可以直接在域名example.b.com下CNAME到你刚刚设置的源站域名origin.a.com即可。然后example.b.com 你就可以继续A类型记录cf的ip即可 分享几个 cf澳门节点电信+联通45.64.22.645.64.22.945.64.22.2145.64.22.2345.64.22.4145.64.22.4245.64.22.56104.31.74.5 联通172.67.136.71 联通172.67.124.63联通162.159.133.13联通移动172.67.69.194172.67.70.160172.67.68.225172.67.28.30172.67.68.225172.67.50.233172.67.72.84后言CloudFlare for SaaS是官方提供的一项非常方便的免费功能,弥补了早期未通过Partner接入只能强制NS接入的缺憾。有官方保障、灵活CNAME、免费的优点,也有源站不灵活等缺点,最后要感谢CF提供这样的免费功能,也欢迎大家在评论区分享你们对这项功能的其他应用方式,一起学习交流吧~
-
WordPress纯代码实现SMTP邮件发送功能 WordPress 本身是有集成 phpmailer, 这里只是调用 phpmailer 而已。WordPress SMTP 邮件功能的全部代码如下,修改相关参数后,直接添加到当前主题的 functions.php 文件中即可://smtp发送邮件功能 add_action('phpmailer_init', 'mail_smtp'); function mail_smtp( $phpmailer ) { $phpmailer->FromName = ''; //名字 $phpmailer->Host = ''; //smtp地址,可以到你使用的邮件设置里面找 $phpmailer->Port = 587; //端口,一般不用修改 $phpmailer->Username = ''; //邮件账号 $phpmailer->Password = ''; //邮件密码 $phpmailer->From = '';//邮件账号 $phpmailer->SMTPAuth = true; $phpmailer->SMTPSecure = 'tls'; //tls or ssl (port=25留空,465为ssl)一般不用修改 $phpmailer->IsSMTP(); }常用邮箱 SMTP 服务器阿里企业云邮箱POP3/SMTP 协议收发邮件服务器地址分别如下: 收件服务器地址: POP 服务器地址:pop3.mxhichina.com 端口110,SSL 加密端口995 发件服务器地址: SMTP 服务器地址:smtp.mxhichina.com 端口25, SSL 加密端口465 腾讯企业邮箱 POP3/SMTP 协议收发邮件服务器地址分别如下: 接收邮件服务器: POP 服务器地址:pop.exmail.qq.com (端口 110),使用SSL,端口号995 发送邮件服务器: SMTP 服务器地址:smtp.exmail.qq.com (端口 25),使用SSL,端口号465
-
-
Typecho 文章批量导出为 md 文件 1、复制下方代码在 typecho 网站根目录创建 converter.php 文件<?php // 运行 php converter.php $db = new mysqli(); // 根据实际情况更改 $db->connect('localhost','数据库用户名','数据库密码','数据库名称'); $prefix = 'typecho_'; $sql = <<<TEXT select title,text,created,category,tags from {$prefix}contents c, (select cid,group_concat(m.name) tags from {$prefix}metas m,{$prefix}relationships r where m.mid=r.mid and m.type='tag' group by cid ) t1, (select cid,m.name category from {$prefix}metas m,{$prefix}relationships r where m.mid=r.mid and m.type='category') t2 where t1.cid=t2.cid and c.cid=t1.cid TEXT; $res = $db->query($sql); if ($res) { if ($res->num_rows > 0) { while ($r = $res->fetch_object()) { $_c = @date('Y-m-d H:i:s', $r->created); $_t = str_replace('<!--markdown-->', '', $r->text); $_tmp = <<<TMP {$_t} TMP; // windows下把文件名从UTF-8编码转换为GBK编码,避免出现生成的文件名为乱码的情况 if (strpos(PHP_OS, "WIN") !== false) { $name = iconv("UTF-8", "GBK//IGNORE", $r->title); echo $name.'<br>'; } else { $name = $r->title; echo $name.'<br>'; } // 替换不合法文件名字符 file_put_contents(str_replace(array(" ", "?", "\\", "/", ":", "|", "*"), '-', $name) . ".md", $_tmp); } } $res->free(); } $db->close();2、使用文本编辑器打开 converter.php 将上方代码中 $db->connect('localhost','数据库用户名','数据库密码','数据库用户名'); 的信息更改为你自己的数据库信息3、打开你的服务器终端4、输入 php converter.php ,就会自动转换为md文件啦